Project 2a
©Jorg Peters
Points: 35
Purpose
Learn how to use affine transformations to position
objects in 3-space
Resources
Set Up
- Use one of: OpenGL or webGL
- For openGL use this code base
- For webGL use this code base
-
The object loader
(modified source files) placed into TUT/common will help for openGL but may need to be modified.
(always backup original files: rebuild may break other tutorials)
Task 1: Grid
Points: 5
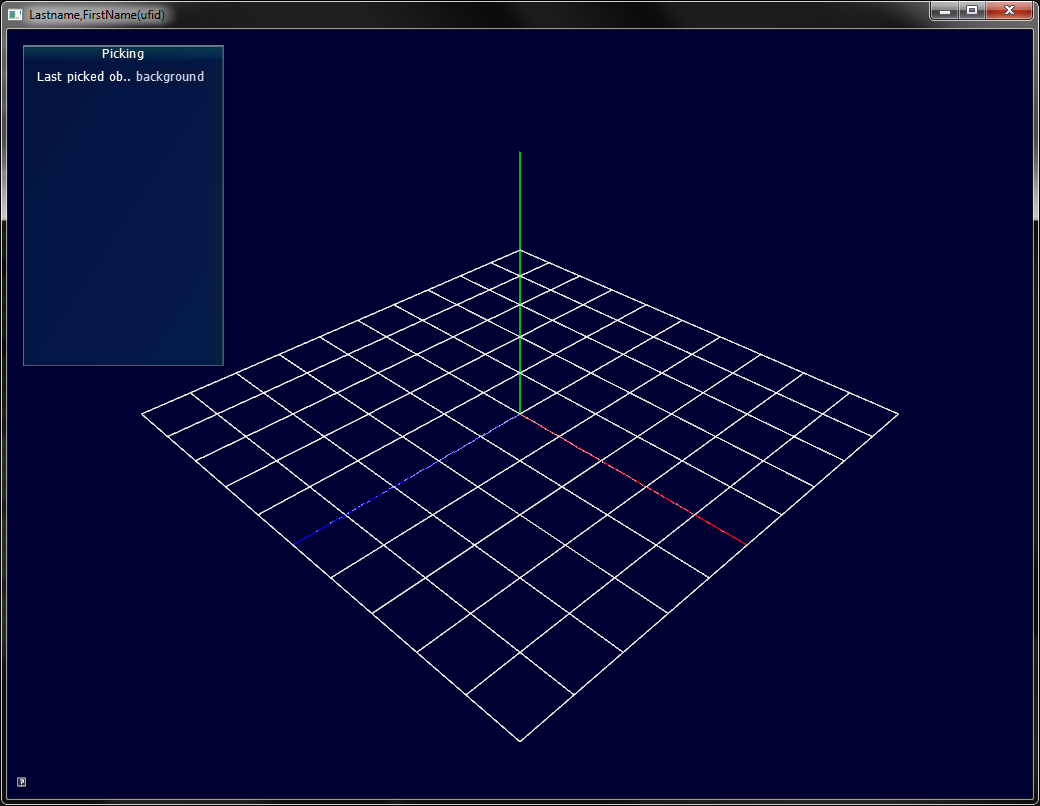
Draw an integer grid on the Y=0-plane for the rectangle
(-5,0,-5) to (+5,0,+5).
Draw the positive X axis in red, the Y axis in green and
the Z axis in blue.
Only draw the positive portion of each axis, of length 5.
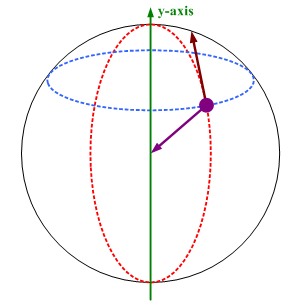
Task 2: Camera Rotations
Points: 5
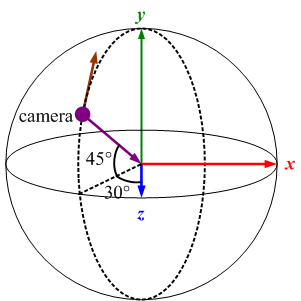
Use Perspective projection
Place the camera so you can see the whole scene:
use glm::LookAt to generate the View matrix.
Key C selects the camera.
Keys
← and
→
move the camera along the blue circle parallel to the equator.
Keys
↑ and
↓
rotate the camera along the red circle orthogonal to the equator.
Choose the "up" direction so the camera always points
to the origin.
Task 3: Draw the robot arm
Points: 25

The robot arm consists of the following parts:
- Base:
truncated tetrahedron placed on the x-z-plane
- Arm1:
rectangular box emmanating from and
hinged at the center of Base.
- Joint:
dodecahedron of appropriate radius at the other end of Arm1.
- Arm2:
cylinder connected to the center of Joint.
Create triangulated objects in the .obj format, e.g. by using Blender.
Hint: generate correct normals for later use.
To load .obj files exported with Blender:
tinyobjloader
(usage best learned by looking at the examples on github) or
the supplied
void loadObject(char* file, glm::vec4 color, Vertex * &out_Vertices, GLushort* &out_Indices, int ObjectId) function to load your objects.
Call void createVAOs(Vertex Vertices[], unsigned short Indices[], int ObjectId)
or find alternative online
WHAT TO SUBMIT
- Your modified source files
(cpp, shader, html, obj, as appropriate)
- A link to a screen capture of your
running program showcasing the implementation
of all of the tasks using
recordit (Mac, Win)
or similar software.
-
Filepaths to load models must be relative to the source directory
(no absolute paths specific to your computer).
-
openGL:
Use a "models" folder within the top-most level of the source repo ("ogl-master").
If you need to deviate specify the location in the readme file.
-
WebGL: store models in the `resources' folder parallel to the .html files.
Otherwise, you must specify the location in the readme file.