Project 2
Points: 90 (+5 +15 BONUS)
Purpose
Learn how to use affine transformations to position
objects in 3-space and illuminate them
Resources
Set Up
- Use this code base.
(note: no webGL code base; bonus)
-
The object loader
(modified source files) placed into TUT/common will help.
(always backup original files:
rebuild may break other tutorials)
Task 1: Grid
Points: 5
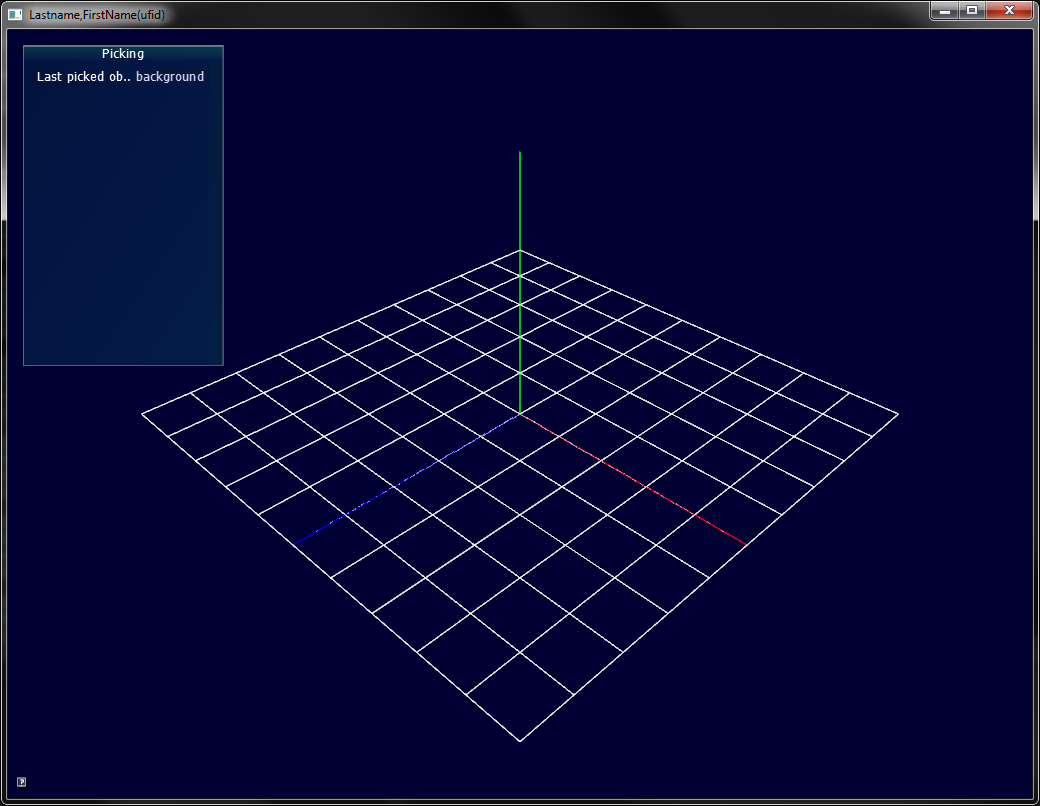
Draw an integer grid on the Y=0-plane for the rectangle
(-5,0,-5) to (+5,0,+5).
Draw the positive X axis in red, the Y axis in green and
the Z axis in blue.
Only draw the positive portion of each axis, of length 5.
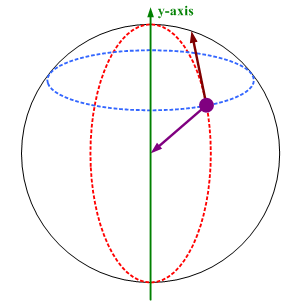
Task 2: Camera Rotations
Points: 5
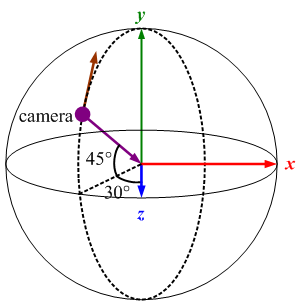
Use Perspective projection
Place the camera so you can see the whole scene:
use glm::LookAt to generate the View matrix.
Key C selects the camera.
Keys
← and
→
move the camera along the blue circle parallel to the equator.
Keys
↑ and
↓
rotate the camera along the red circle orthogonal to the equator.
Choose the "up" direction so the camera always points
to the origin.
Task 3: Draw the robot arm
Points: 25
The robot arm consists of the following parts:
- Base:
truncated tetrahedron placed on the x-z-plane
- Top:
icosahedron placed on top of and slightly penetrating the Base.
- Arm1:
rectangular box emmanating from Top and
hinged at the center of Top.
- Joint:
dodecahedron of appropriate radius at the other end of Arm1.
- Arm2:
cylinder connected to the center of Joint.
- Pen:
truncated octahedron connected to the other end of
Arm2.
- Button:
a small box on Pen.
Create triangulated objects in the .obj format, e.g. by using Blender.
Hint: generate correct normals for later use.
To load .obj files exported with Blender:
tinyobjloader
(usage best learned by looking at the examples on github) or
the supplied
void loadObject(char* file, glm::vec4 color, Vertex * &out_Vertices, GLushort* &out_Indices, int ObjectId) function to load your objects.
Call void createVAOs(Vertex Vertices[], unsigned short Indices[], int ObjectId)
or find alternative online
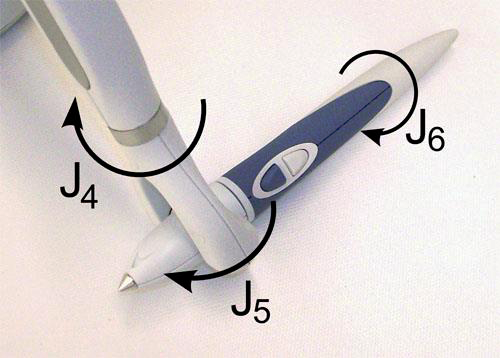
Task 4: Keyboard interaction
Points: 5+5+5+5+15
Write the code to move the robot arm, rotate the top, rotate
the arms and the pen, and twist the pen using the keyboard, as explained below:
-
Pen: Select the pen using key
p. The pen should rotate when the arrow keys are
pressed.
←,
→,
↑ and
↓
are longitude (J4) and latitude (J5) rotations.
(Note that one end is always connected to arm2).
shift+← and
shift+→
should twist the pen around its axis (J6) (including buttons).
- Base: Select the base using key
b. The whole model should
slide on the XZ plane according to the arrow keys.
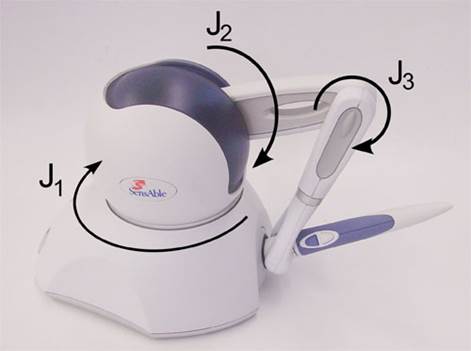
-
Top : Select the top using key
t. The top, arms and pen should
rotate about the Y direction when pressing
the left or right arrow keys (J1).
-
Arm1: Select arm1 using key
1. The arm
(and the other connected arm and pen) should rotate up
and down when using the arrow keys (one
end is fixed at the center of the top green cylinder) (J2).
- Arm2: Select Arm2 using key
2. The arm (and pen) should rotate up
and down when using the arrow keys (one end is fixed at the center
of the joint) (J3).
Indicate the selected part by drawing it in a brighter color.
Task 5: Light up the scene
Points: 10
Add two lights to the scene.
For each light, supply position, diffuse color, ambient color
and specular color.
Position the lights near the camera so that one light comes from
the left and another one from the right.
You are free to choose any light colors and positions as long
as the scene looks good.
Set diffuse and ambient material of the objects to the color of the object.
Set specular as a multiple (eg one tenth) of the diffuse color.
Task 6: Teleporting
Points: 10
When s is pressed
have a Platonic solid exit the tip of the stylus,
with tangent equal to the stylus axis and derivative
in length equal to the stylus length
The solid follows an arc according to Newton's law under gravity
until it hits the grid. (Hint: use the BB-form of degree 2)
Animate the projectile and, on impact,
move the robot arm to the impact location.
BONUS Picking
Points: 5
Implement picking for selecting the parts of the robot arm. Use your knowledge acquired in Project 1. You might also find the original tutorial on picking helpful.
BONUS webGL
Points: 15
Implement the project in webGL instead of openGL
WHAT TO SUBMIT
- Your modified source files
(.cpp's, shaders, etc)
- A link to a screen capture of your
running program showcasing the implementation
of all of the tasks using
recordit (Mac, Win)
or similar software.
-
Filepaths to load models must be relative to the source directory
(no absolute paths specific to your computer).
Use a "models" folder within the top-most level of the source repo ("ogl-master").
If you need to deviate specify the location in the readme file.